
Gravity Forms is the preferred plugin for website lead forms on our WordPress websites. This plugin offers a wide variety of features, customizations and add-ons, which makes it an ideal tool for businesses we work with. Additionally, the user interface is simple, straight forward, and easy to work with. In this article, we’ll show you how to create and edit a Gravity Form on your site.
Using Gravity Forms
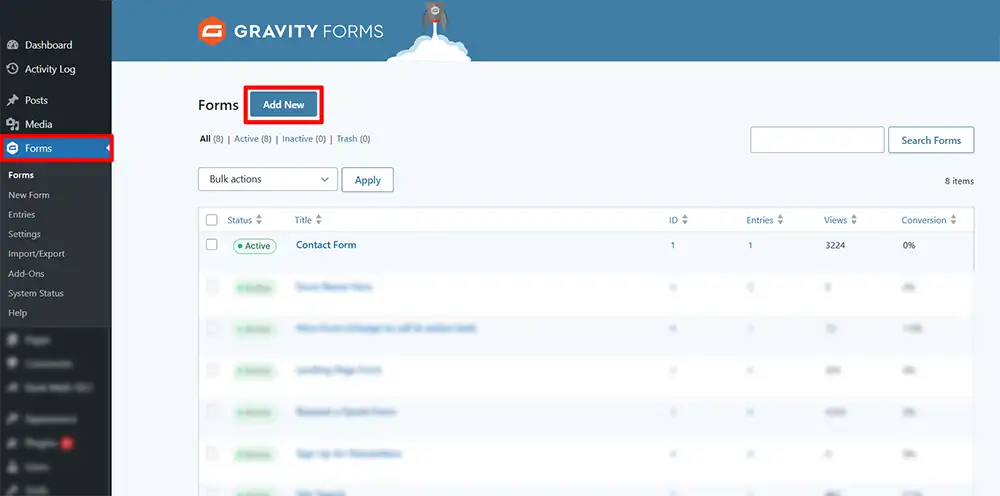
The first step is open the Gravity Forms tab in WordPress.
To do this, log into the backend of your site and click on the link that reads ‘Forms’ in the left-hand sidebar. You’ll arrive at the main Gravity Forms page, where you can access and edit the various forms you have or will create for your site.
Gravity Forms Breakdown
Let’s take a quick look at what the main Gravity Forms page has:
- Add New Button: The first thing to take note of is the big friendly button that says ‘Add New’ at the top. This is your easy one-click solution to create a new form.
- Form Activate/Deactivate: Next are the series of buttons beside the form titles. These green/gray switches are fairly simple and serve a singular purpose: they activate and deactivate your form. This makes the removal of a form that needs work as simple as flipping a switch!
- ID column: This number is unique to each form and identifies your form from others. You can use this ID number, or Form Name, to place the form to specific pages and locations.
- Entries column: This value shows you how many times your form has been filled out. By clicking the number, you can view the entries list, and select and view individual responses.
- Views column: This shows you how many times a page with your form has been viewed by users visiting your site.
- Conversions column: The percentage indicates the number of users who viewed your form and also filled it out.
Creating a New Form
To create a new form, click the new form button. The next screen you see will often present Templates that recent versions of Gravity Forms now has available. Choose any you want.
We will start with the basic Simple Contact Form. Click Use Template, then add a Name (required) and Description (optiona) as prompted, and click the “Use Template” button presented.
Check out our screenshots below:

You will then be presented with the form fields to customize them based on what you chose for Template.
Select Additional Field Types:
If you want to add more fields to your form than what came packaged with the template you chose, you can select those using the right side navigation.
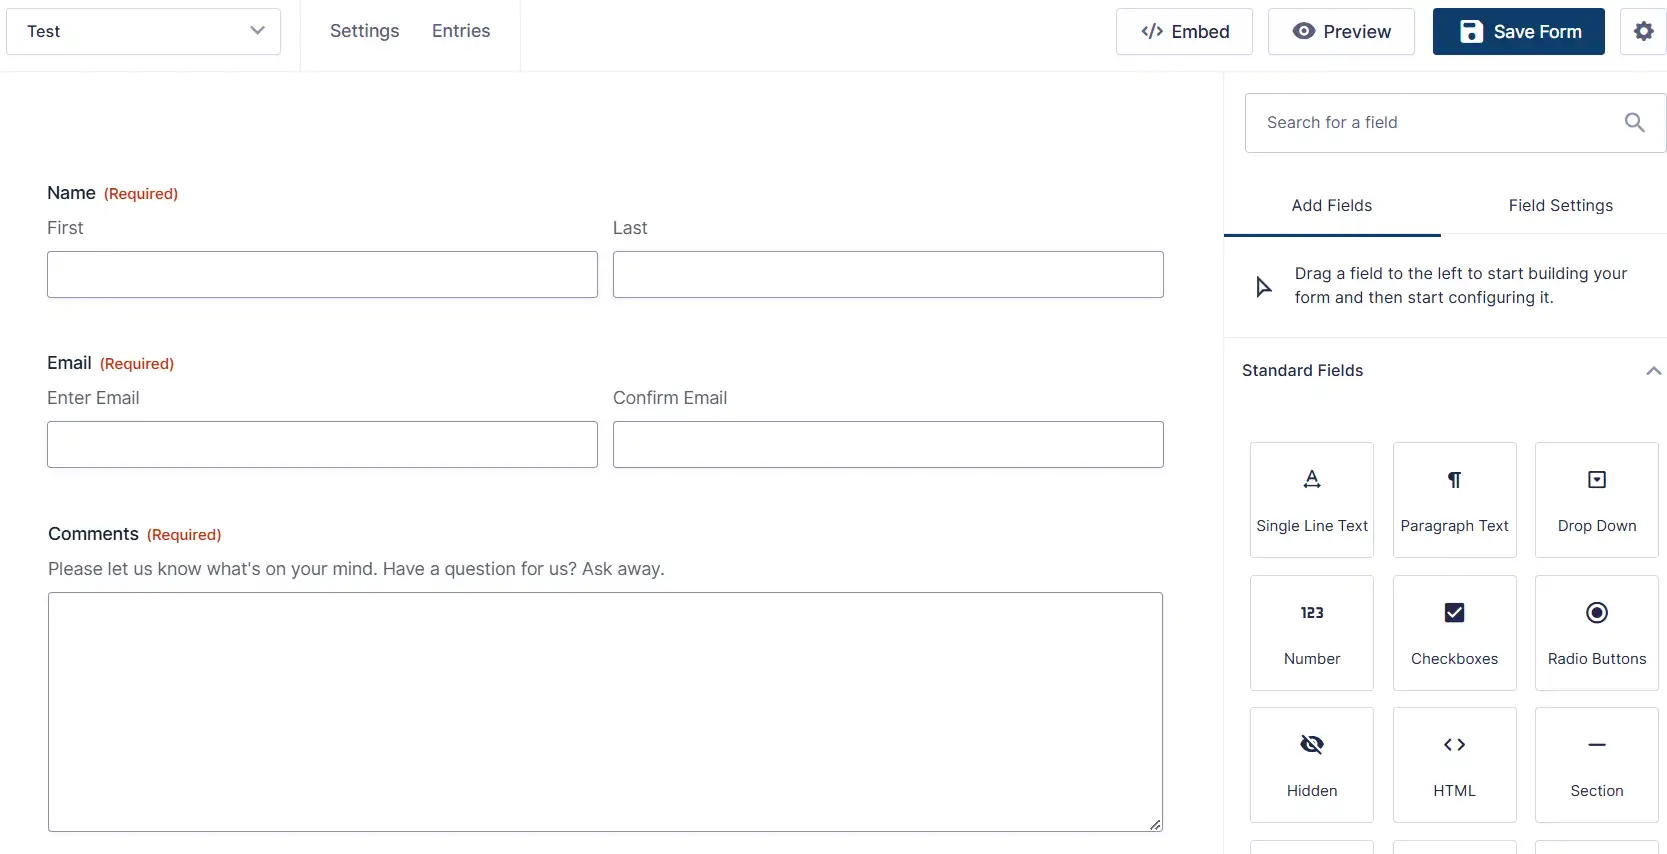
Simply move to the right side of the page and pick one of the multitude of field options under the different sections. To add a field to your form contents on the left, simply drag & drop from the right column.
See the video below:
Arrange the Fields
Once you’ve created your various fields, you can place them in any order you prefer simply by dragging them above/below one another.
After you’re satisfied with your form, simply click the ‘Update’ button to save it.
How to Insert Your Gravity Form Into a Page
You’ve created your form, but how do you place it on a page? This is simple to do when working with a TheeDigital WordPress website.
Simply navigate to the page you want to add the form to, navigate to the location of the page you want to add the form, and click on the ” + ” to “Add Block” and start typing in “Call to action” or, click “See All” and navigate on the left nav menu that pops open to the “Call to Action” block that is within TheeDigital Blocks.
See video below:
Congratulations on creating your first form. If you’d like to receive notifications when it’s filled out, then go ahead and read our guide on How To Update Admin Notifications In Gravity Forms.
Contact TheeDigital for Website Development Today
Looking for an experienced web design agency that can create a professional looking website for you that is search engine friendly and easy to manage? Contact our award-winning web designers and internet marketing professionals in Raleigh, NC at 919-341-8901 or schedule a complimentary consultation and website review.
Tags: Our Favorites • WordPress • Support
Richard Horvath
Richard Horvath is the founder of TheeDigital, a Raleigh based award-winning web design and digital marketing agency. He is proud of his team and the results that they provide to their clients.