Gravity Forms is a well-loved by lead-capturing plugin for Wordpress users, as well as the chosen plugin used by TheeDigital. However, a question we get often in the support department at TheeDigital is
“How do I change who gets emailed when a contact form submission comes in?”
Well, we are here to help. In this article, we’ll explain how to adjust notification emails in Gravity Forms.
Step 1: Sign into WordPress
In order to change your form’s notifications, you need to sign into your site’s dashboard.
Step 2: Select the Gravity Form You Want Notifications for
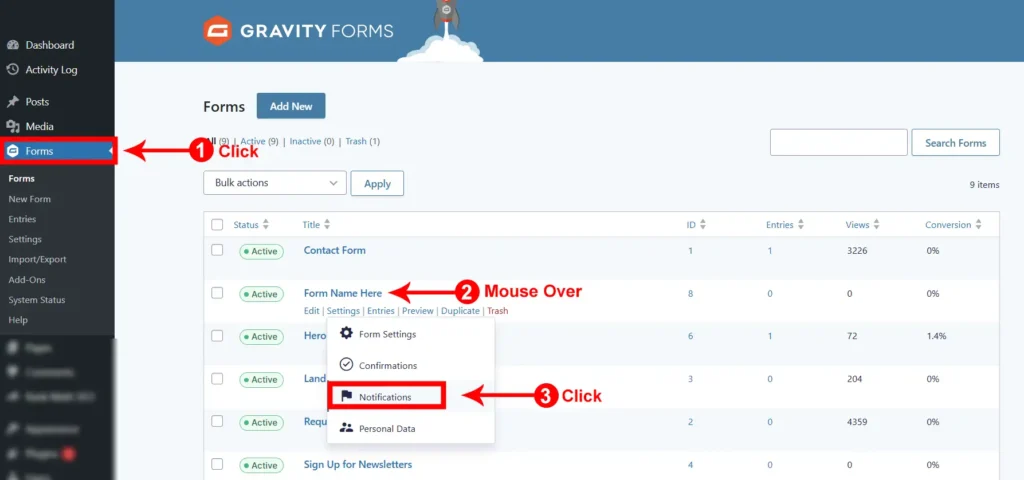
The first thing we’re going to do is select the form you want to change notifications for. To do this, simply select the ‘Forms‘ tab on the left-side of your screen then, once you are inside, there should be a list of Gravity Forms to choose from. Select your form and you’re ready for the next step!
Step 3: Select Notifications
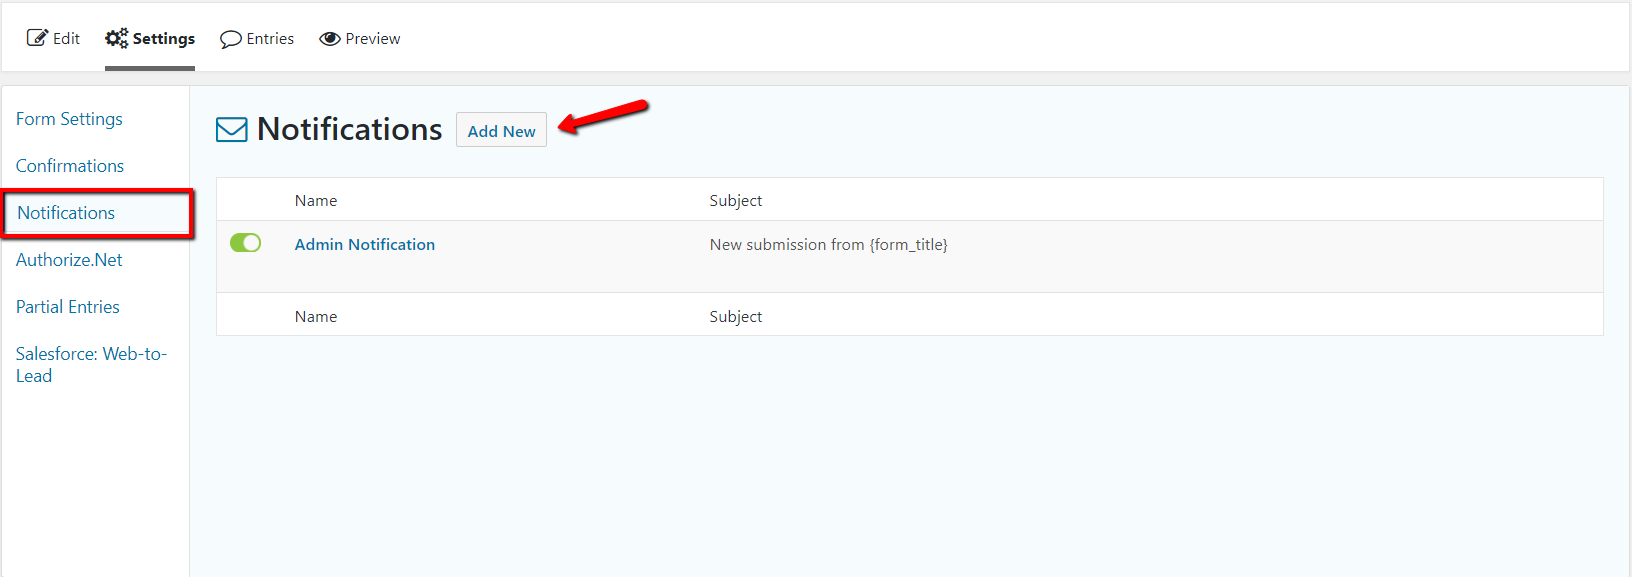
Once you’ve entered the Settings page, you’ll want to click on Notifications, then click the button that reads ‘Add New‘ in big, friendly letters.

Step 4: Fill Out Your Notification
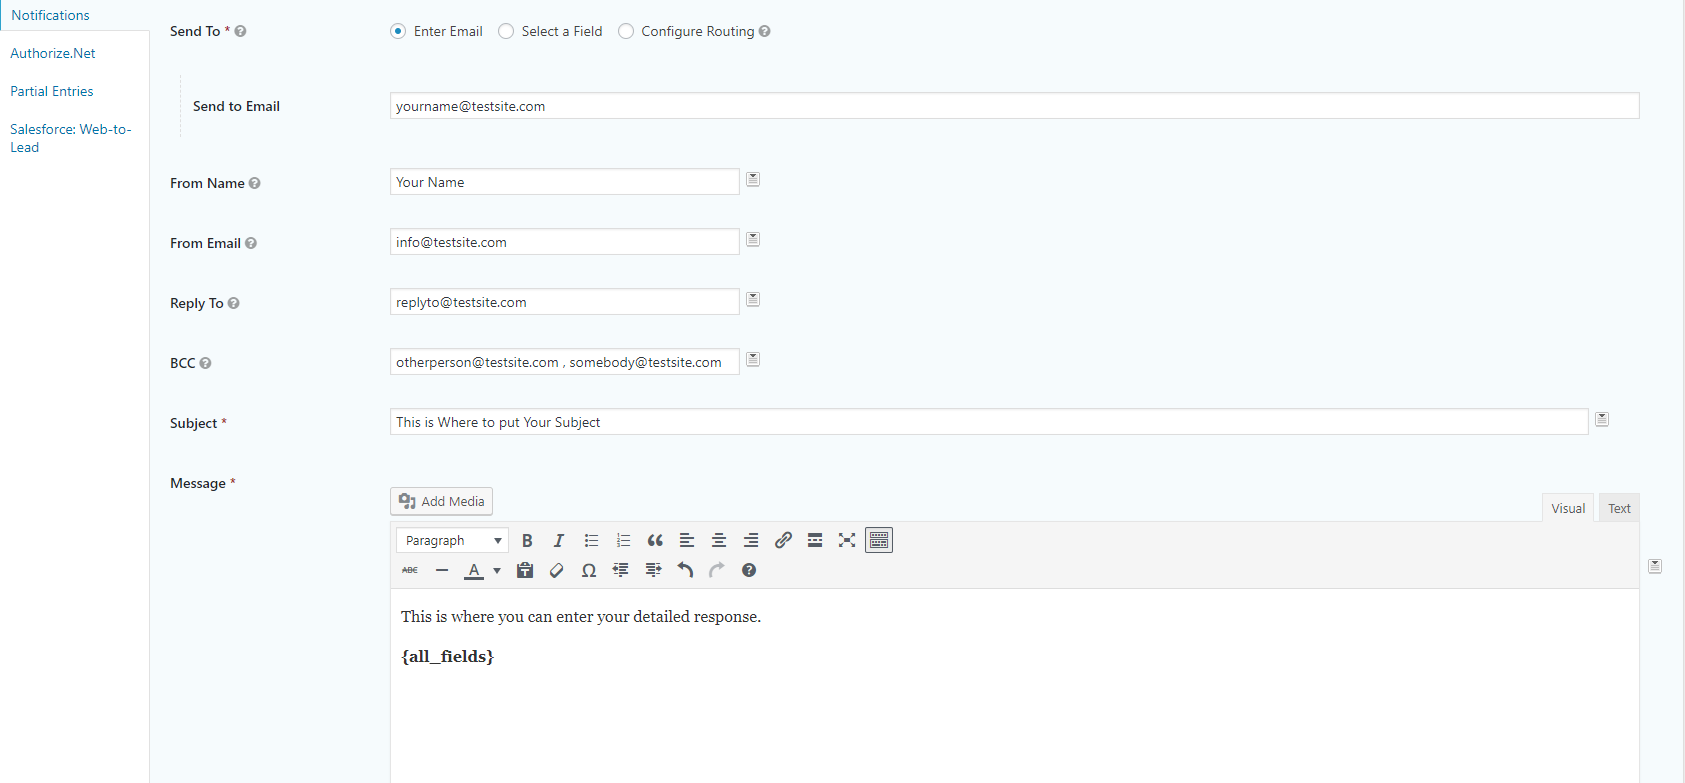
This is the moment you’ve all been waiting for, creating the notification! First, we’re going to create a name for the Gravity Form’s notification. Keep things simple and easy to organize. In this case, because we’re making a notification for Administrators to view, we’ll call it “Admin Notification.” Next, make sure you’ve selected ‘Enter Email‘ for your Send To option because this will ensure that you’ll be notified via email when your form is filled out.
The next few fields will need to be filled out with detailed information.
From Name: This field is where we’ll enter the name that will display as the sender of our notification email. This information can be dynamically generated, or simply static. You can even use fields from the form itself! To do this, simply click on the Merge Tag icon to the right of the field and select at your leisure.
From Email: This field is for the email address we want to send notifications from. You can enter a static email address, or choose an email address from a field entry in your form using the Merge Tag icon. We recommend sending the email from an address associated with your website so spam filters won’t flag it, such as info@testsite.com.
Reply To: This field is where we’ll enter the email address that replies should be sent to. Again, this can be static or selected using the Merge Tag icon.
BCC: This field allows you to add other recipients of the notification. Simply enter the email addresses of individuals you want to notify and be sure to separate each entry with a comma.
Subject: This is, as it would appear, the place where you enter the Subject of your notification, i.e. New Submission from Test Form.
Message: The final and all important section of your notification, the message. In this field you will want to enter the information you’ll want to receive from the notification. You can customize it to display a copy of the form’s entries along with other information. Most importantly, enter {all_fields} into the Message field, to display your forms data.

Step 5: Optional Modifications
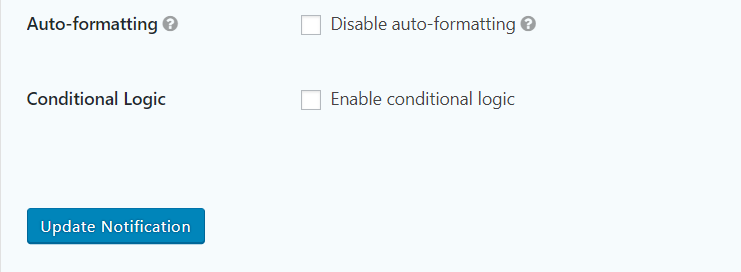
Now that you’ve finished entering the information into the fields, a final challenge appears — this time in the form of two check-boxes! Auto-Formatting enables and formats paragraph breaks and other formatting information into your message. So, unless you wrote the message using HTML, you can leave the ‘Disable auto-formatting’ box unchecked. The final option, Conditional Logic, allows the user to create rules that determine whether or not the notification will send. Because that topic is complex enough to warrant its own post, we’ll dive into that rabbit hole another time. So, for now, you can leave the ‘Enable conditional logic’ box unchecked.

Final Step: Save and Pat yourself on the back
So, the only thing you need to do is click the “Save Notification” button. Congratulations, you’ve just built your first notification for Gravity Forms!
Do You Need More Help Updating Your Form Notifications?
Tags: Questions & Answers • Support


