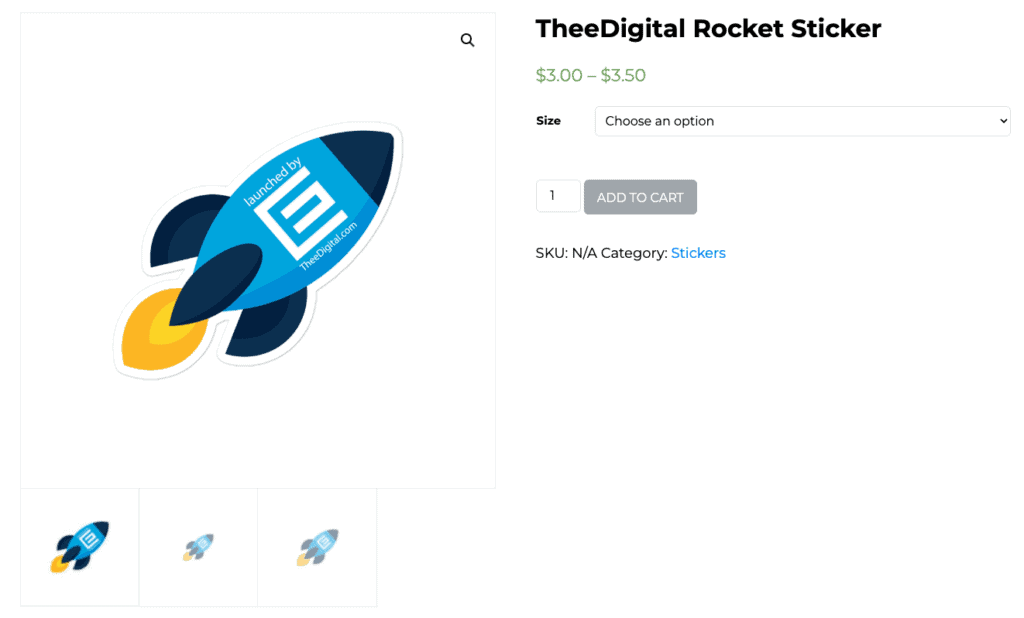
With WooCommerce’s Variable Products, customers can select options such as their desired size and color for a certain item. These options are known as “attributes” with the capacity to be created unlimitedly by store admins.
After a customer makes their selection of attributes from drop-down menus on the product page, the resulting combination is known as a variation which acts like a parented version of its final form in your cart.
So go ahead and give your shoppers an enhanced shopping experience with WooCommerce’s Variable Product feature today!
How to Add a Variable Product in WooCommerce
The following step-by-step instructions by our WooCommerce development team will help you create variable products in your WooCommerce store.
Step 1: Add global product attributes
To get started, it’s important to understand what global product attributes are and how you can use them. A key element of successful modern inventory management is being able to apply relevant characteristics to your WooCommerce products – such as the size or color to your products so customers know exactly what they’re getting. This makes creating global attributes a cornerstone in the process – giving you one set that applies across multiple items!
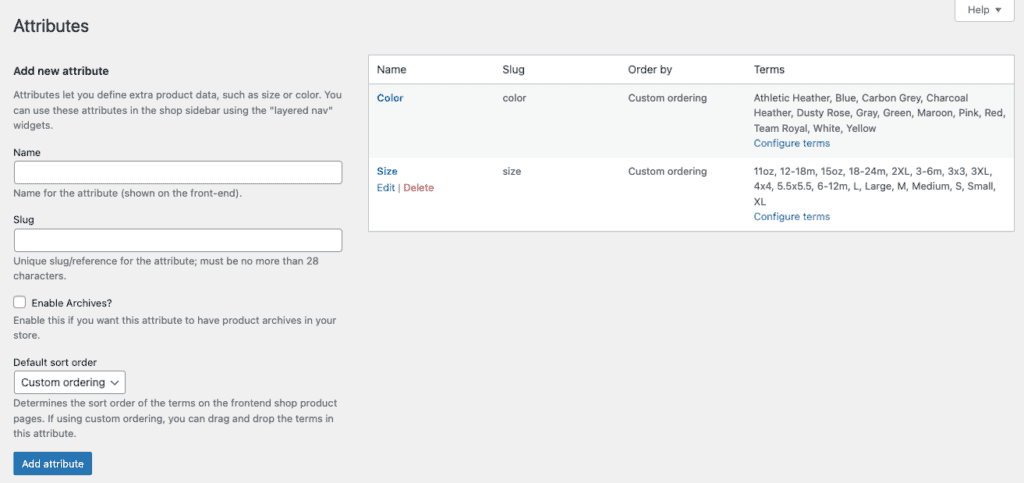
- Go to Products > Attributes.
- In the Add new attribute section on the left, enter the name of your attribute in the Name field (e.g., Color).
- Click Add attribute.
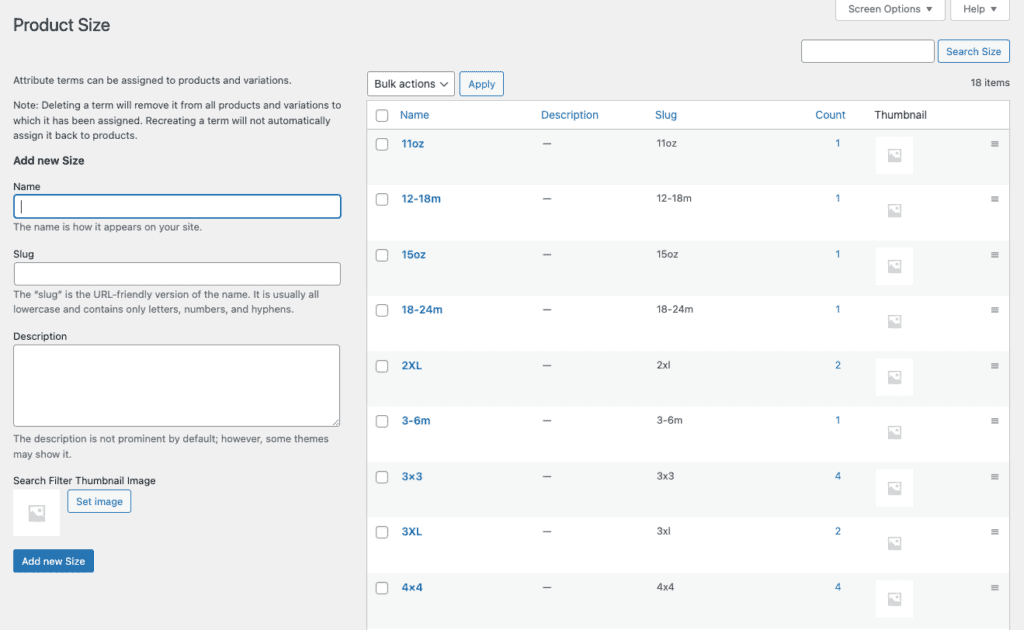
Now we need to add the attribute terms. These are specific values of an attribute, like small or different sizes.
- Click Configure terms in your attribute’s Terms column.
- In the Add new Color form on the left, enter the name of your first term (e.g., Red).
- Click Add new Color.
- Keep repeating for each term until you’re done.
Step 2: Select your product type and create your product
Congratulations! You’re ready to take your product customization up a notch and add your variable products.
- Go to Products > Add New.
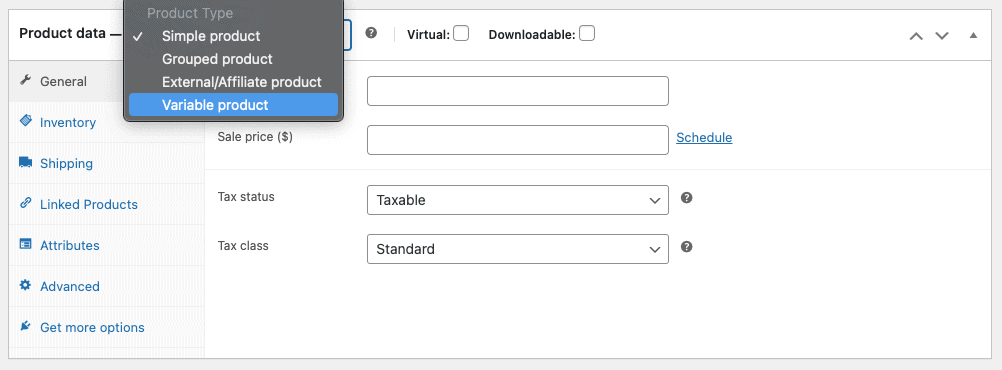
- Scroll down the page to the Product Data section.
- Select the Variable product option from the product data dropdown.
Step 3: Add attributes to your product
Your WooCommerce variable product has been successfully configured! Now it’s time to begin assigning the attributes.
- Click the Attributes tab in the Product Data section.
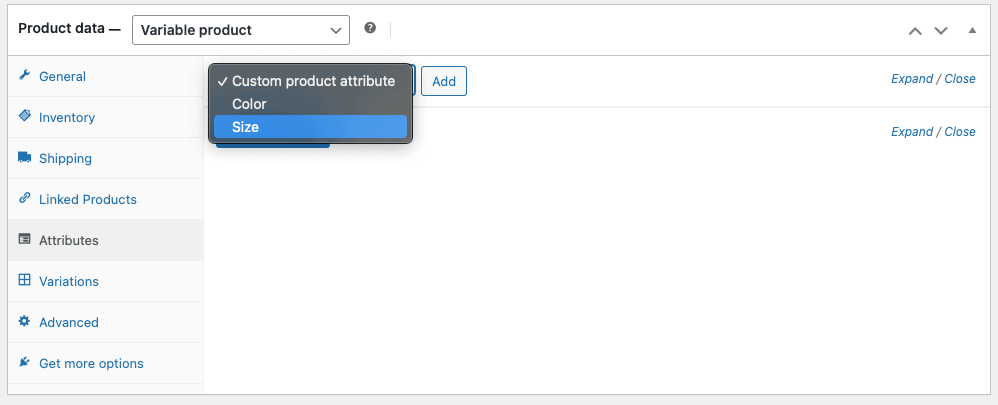
- If you’re adding global attributes:
- In the Custom product attribute dropdown, select one of the attribute names you created and click Add.
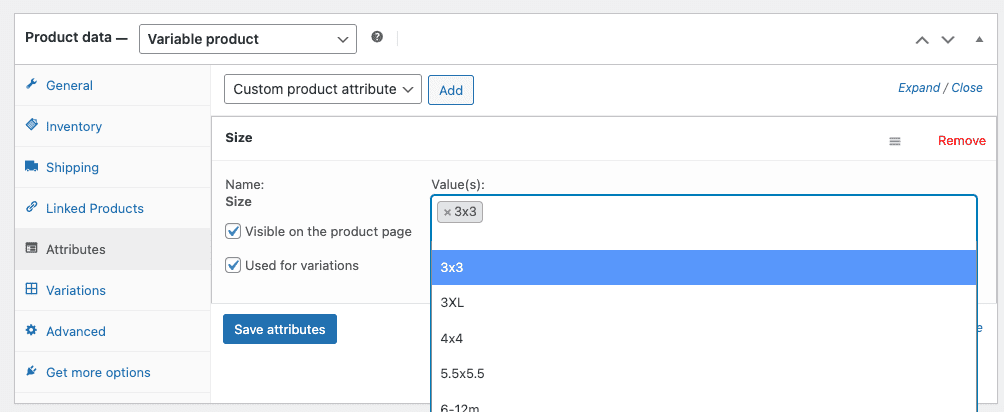
- Click the Value(s) menu and select any attribute values you’d like to display as options for the product (you can select more than one). This is how you can add product variations to your ecommerce options.
TheeDigital is Here to Help
Contact our web development agency if you would like assistance optimizing your WooCommerce products!? Our award-winning WooCommerce website developers and ecommerce marketing professionals are just a phone call away at 919-341-8901 or schedule a complimentary consultation and website review.
Tags: Support • WooCommerce


